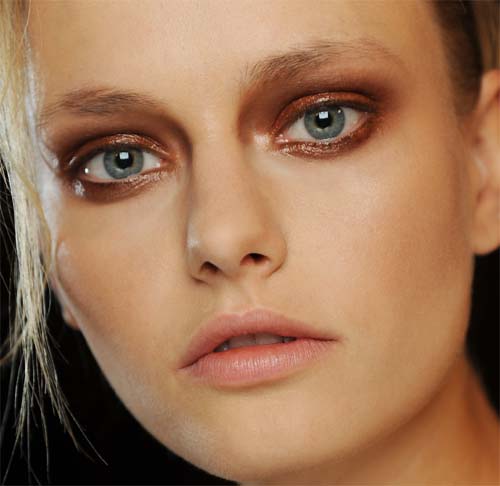
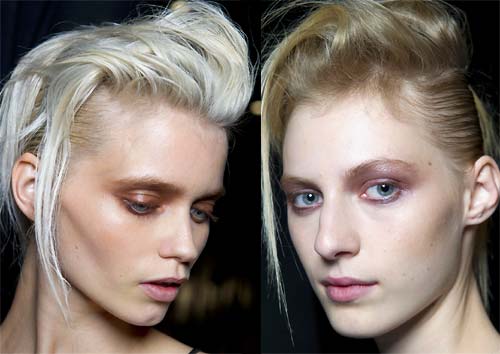
At the Haider Ackermann Spring/Summer 2012 show in Paris, makeup artist Stephane Marais used M·A·C Cosmetics to create glossy, “poetic”, taupe eyes while Eugene Souleiman from Wella Professionals gave models “rebellious” hair.

Face
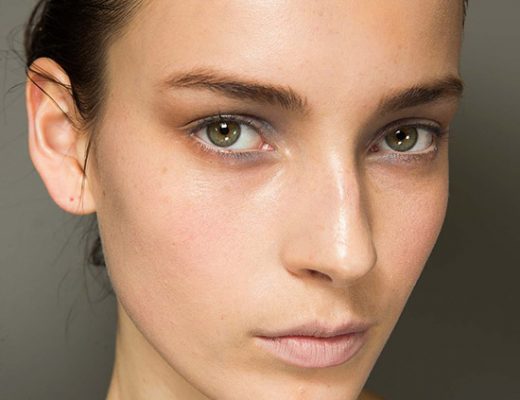
• Face & Body Foundation – lightly applied over hydrated skin to even skintone and perfect.
• M·A·C PRO Tint Cream Colour Base – blended under cheekbones to sculpt.
Eyes
• Coffee Eye Pencil – applied through both the upper and lower lashline to make lashes appear thicker at their root.
• M·A·C PRO Concrete and Shale Eye Shadow (taupe-toned eyes) – mixed together to create a customized taupe for eyes, blended around the eyes to emphasize the crease and lower lashline.
• Mulch Eye Shadow (sepia-toned eyes) – layered and blended over coffee pencil to create sepia-toned eyes, emphasizing the crease and lower lashline.
• M·A·C PRO Medium Blot Powder/Loose – applied under eyebrows and eyes for a matte effect.
• M·A·C PRO Shine Mixing Medium – applied over eyelids for a shiny, glossy finish to eyes.
Lips
• Lip Conditioner SPF 15 – hydrates and perfects lips with a natural finish.
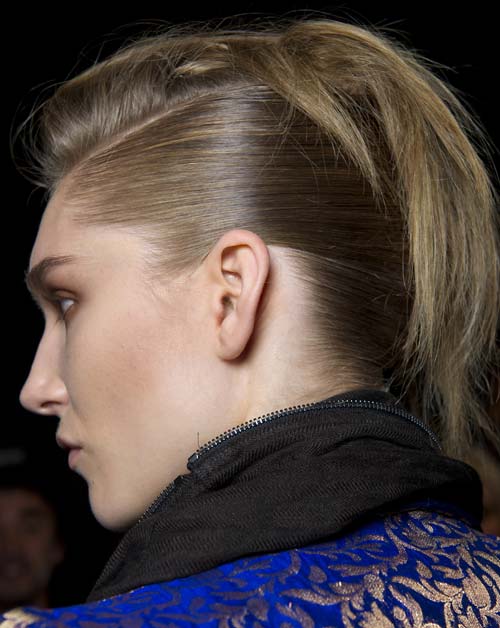
“This is a chic, dishevelled, boyish look. I was thinking about the style of a young aristocratic boy who parties a little too hard, and wanted to transfer this look to a beautiful young woman to create a slightly androgynous hairstyle. The key to this style is an illusion of short hair, with a textured ‘foppish’ top. I love the idea of imperfection and wanted the hair to look as if the girl had been partying all night and the roots of her hair were a little unwashed and sweaty, in contrast to the perfectly sleek underneath section. This hair look is all about looking cool with an attitude, it’s tough, contemporary and full of character; rather like the Haider Ackermann woman”, says Eugene.
Step 1. This look is focused on creating a “day old” hair but with a freshly washed base, so always start with freshly washed and conditioned hair. Use Wella Professionals Enrich Shampoo and Conditioner.
Step 2. Roughly dry the hair, keeping it as flat as possible, if hair is very textured, use Wella Professionals Velvet Amplifier as a base styling product to smooth out the hair surface and act a as primer for the subsequent styling products.
Step 3. To create the illusion of short hair, you first need to take the underneath hair away, to create a flat and shiny base. Clip the top section of hair out of the way, and start to make a very flat chignon, taking the hair section by section and spraying the roots with Wella Professionals Stay Essential Finishing Spray until they are saturated. Brush this through the hair with a small soft bristle brush; hold the section tight as you go to create tension. Repeat this process, ensuring that each section is sprayed wet as you go (once the hair spray dries it will slightly ‘shrink’ which helps to pull the hair even tighter).
Step 4. When you have all the hair contained in one section, create a chignon by squashing the hair and rolling it back on itself and then pinning the hair into place, but ensure that the top ‘tail’ of the chignon remains free as this will form part of the top look. The chignon must be as flat to the head as possible.
Step 5. Release the top section of hair and tease towards the front of the head, clipping into place as you go. Spray Wella Professionals Create Character Texturizing Spray in to the roots and rub it` in with finger tips to loosen the hairstyle and to create a different texture.
Step 6.Fold the front piece of hair back on itself and pin down roughly, spritz liberally with Wella Professionals Ocean Spritz Beach Texture Spray to create a slightly rougher texture to the hair and give it some ‘bite’.
Step 7.Using a hairdryer with a diffuser attachment, apply heat lightly over the entire head to set the style in place.
Step 8.Finally, pick out end sections from the top and use straightening irons to clamp the ends to create separation and give a “piecey” finish.
Photos: Courtesy of M·A·C Cosmetics and Wella.

No Comments