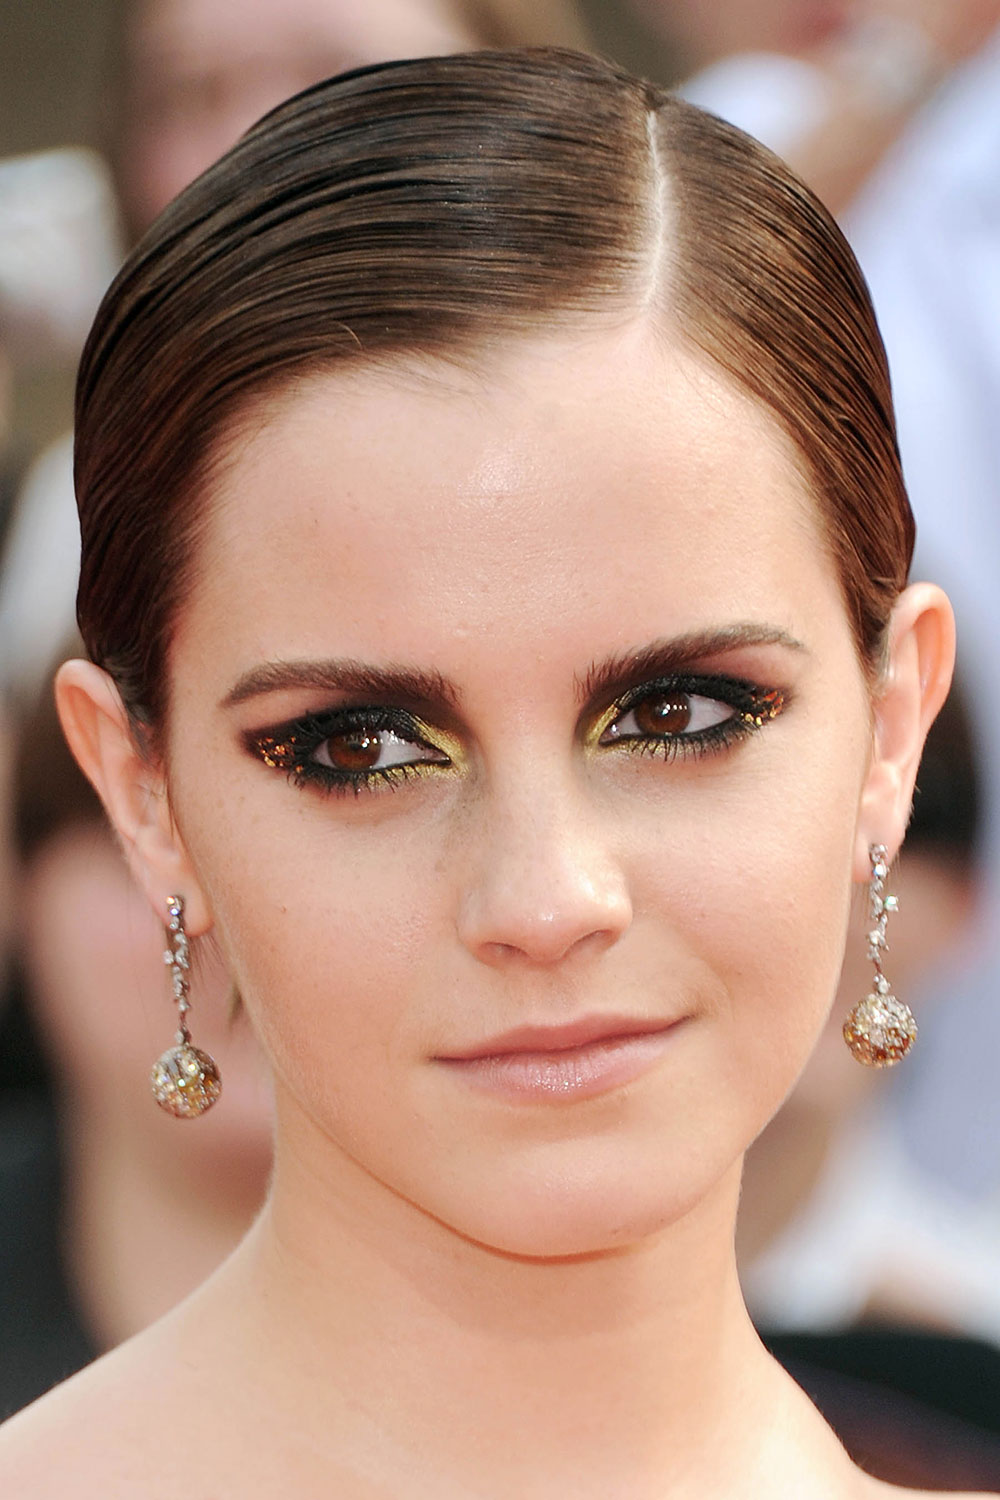
At the ‘Harry Potter And The Deathly Hallows: Part 2’ New York Premiere last month, Emma Watson paired her slicked-back pixie cut with a defined gold and black cat eye and nude lips. I loved how powerful the look is and those golden foil on the outer corners are such a nice accent! Read on to see my step-by-step tutorial on how to recreate this gorgeous eye makeup.


Step 1. Prep the eyelid with a primer to ensure more vibrant and longer-lasting color.
Product Used: NARS Pro Prime Smudge Proof Eyeshadow Base

Step 2. Apply a golden yellow eyeshadow onto the inner corner of the eye. Wet the brush for more intensity.
Product Used: MAC Golden Lemon Pigment

Step 3. Pat a metallic charcoal eyeshadow onto the remaining eyelid.
Product Used: MAC Knight Divine Eyeshadow

Step 4. Sweep a black eyeshadow onto the crease. Drag it past the outer corner for a cat-eye shape. To copy Emma’s look down to a T, drag the color from the inner corner towards your brow as well.
For the perfect cat-eye shape, hold a Kleenex or apply medical tape under the eye before you apply the color. Alternatively, clean up the line with a foundation brush or sponge dipped in foundation.
Product Used: NARS Pandora Duo Eyeshadow

Step 5. Apply the golden yellow and charcoal shadows on the lower eyelid.
Product Used: MAC Golden Lemon Pigment and NARS Pandora Duo Eyeshadow

Step 6. Run a black pencil eyeliner along both upper and lower lashlines.
Product Used: NARS Via Veneto Larger Than Life Long-Wear Eyeliner

Step 7. Go over the line with a black liquid liner to add drama and staying power.
Product Used: Jealousness Waterproof Eyeliner in Smoked Black BK-II

Step 8. Apply tiny pieces of gold foil on the outer corner of the eye. Don’t have any handy? Dab some of the golden yellow eyeshadow with a damp brush instead.
Product Used: MAC Golden Lemon Pigment

Step 9. Coat your lashes with black mascara. Add fake lashes as desired.
Product Used: CoverGirl Natureluxe Mousse Mascara in Very Black and Jealousness Fake Lashes in JS-507 Captivating Cat Eye

Step 10. Clean up any eyeshadow fallouts and you are done!

Extra Tips On Nailing The Look
• When working with dark colors on the eyes, do your foundation and concealer last to avoid a massive cleanup.
• To prevent colors from turning muddy, always start with lighter colors before moving to the darker ones.
• Since this is very defined, strong look, do not worry too much about the blending. Just make sure to keep the undereye area as clean as possible.

9 Comments
wow….. your version is even better than the original one!!!
Thanks Alva =) My eyes aren’t as deep-set as Emma’s so I had to tweak it.
Gorgeous!! I think I like yours better!
This is such a dramatic look and you totally nailed it!!! Love the idea of using the gold eyeshadow instead of the foil!
i would agree with Alva tht ur version is better… ur look is neat and perfect !! 🙂
Thanks everyone!
believe me ! you have to make your own youtube channel
you are beautiful and so talented .. your tutorials are amazing .. i bet you can be huge in youtube’s beauty comunity in like no time !
Hi, love this look! Wish I do it as good as you do. Can you tell me what brushes you use for this look?
what is light make and how is use